![]()
Frequently Asked Questions
Below are some help topics and tips to help you with using kloverpoint Web Page Creator.
Is kloverpoint free?
YES!! You can sign up for a free kloverpoint account. No credit card required to create your free account. There is no cost for you to sign up for your kloverpoint account, however, free kloverpoint accounts have some limitations. For more details, please CLICK HERE.
Can I cancel my kloverpoint Pro or Pro PLUS account at any time?
Absolutely!! You can cancel any kloverpoint upgrade subscription at any time. We recommend that should you decide to cancel your kloverpoint Pro or Pro PLUS subscription, you should do so at least five (5) days before your next subscription renewal billing date. Failure to do so may result in your authorized payment method being charged the monthly subscription fee.
If you cancel your kloverpoint upgrade subscription, you will continue to have access to all the features until the next subscription billing renewal date.
How do I edit my kloverpoint Profile page?
The kloverpoint Profile page is the first webpage that all visitors will see when they visit your kloverpoint user account.
When you log in to your kloverpoint account, your kloverpoint account profile is the first page that displayed. At the top of this page, you will see quick menu buttons. Click on the "Edit My Profile Page" button and you will be directed to a page that will allow you to make changes to your kloverpoint account and Profile Page.

The other way to edit your kloverpoint Profile page is to open the kloverpoint Menu by selecting the Menu button in the top left corner and click on the "My Account" link. The My Account link will direct you to your kloverpoint Profile page.
How do I create a kloverpoint Webpage?
kloverpoint Webpages allow you to showcase your content for the world to see. To create a kloverpoint Webpage is quick and easy.
When you log in to your kloverpoint account, you will be immediately redirected to your kloverpoint account profile page. At the top of your kloverpoint account profile page, you will see quick menu buttons. Click on the "Add a New Webpage" button and you will be directed to the page that will allow you to add a Webpage title and your Webpage content.

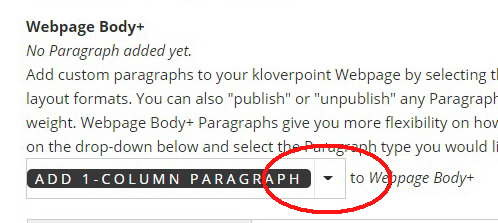
The first section where you can add your content is the "Webpage Body". You are not required to add any content in this Section. If you would like to use custom layout options to display your content, you can click on the Webpage Body+ drop-down and select the layout of your choice.
Can you customize the layout of a kloverpoint Webpage?
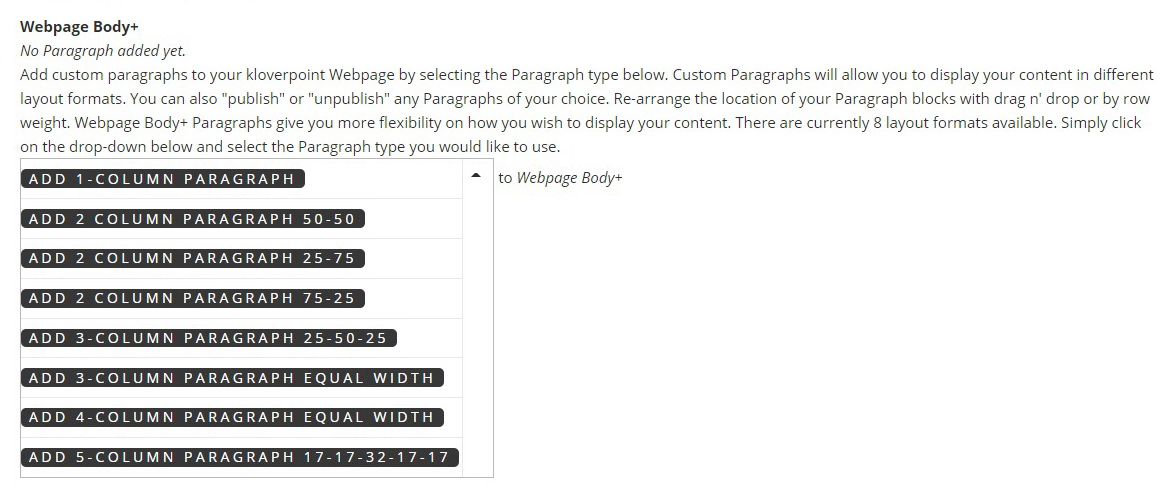
kloverpoint web page creator currently offers 8 Webpage layouts that can be added as separate paragraphs so that you can fully customize and design your Webpage.
To add a Paragraph type, click on the drop-down arrow to display the Paragraph format types:
From the list of available Paragraph format types, simply click on the format type that you would like to add.
How do you re-order kloverpoint Webpage Paragraph Blocks?
If you are using kloverpoint Webpage paragraph blocks to design the look and feel of your kloverpoint Webpage, you can easily decide the order of how the paragraph blocks are displayed. The ways that your paragraph blocks can be re-ordered will be dependent on the web browser you are using.
Method #1 - Drag and Drop
Some web browsers will display the "drag and drop" option.

This option allows you to left-click on the top left corner of the paragraph block that you wish to move, and drag it to the location where you would like the paragraph/content to be displayed.
Method #2 - Row Weight
Some web browsers will display the "Show/Hide row weights" option. This option allows you to determine the where the Webpage paragraph block will be displayed based on the total number of paragraph blocks.

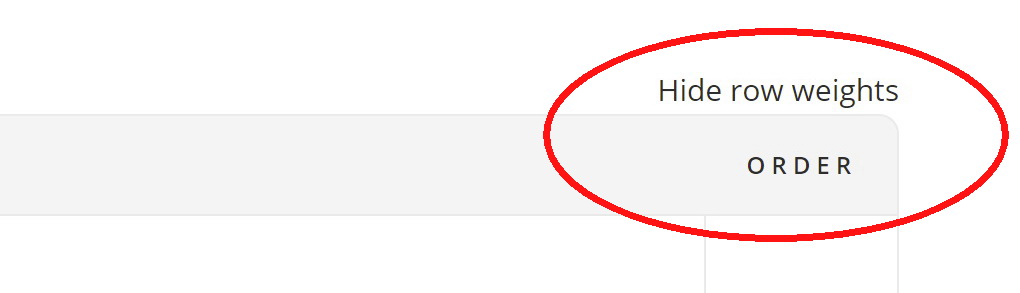
To use this option, click on "Show row weights" located in the right corner of the first Webpage paragraph block that you have created. A column will appear on the right side titled "Order".
You will see a toggle displaying the current location of the Webpage paragraph block.
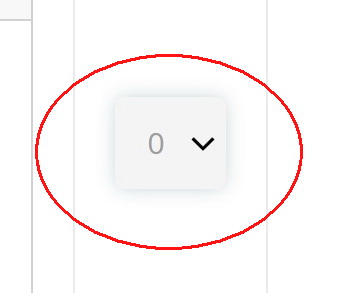
Click on the drop-down arrow and a numbered list of paragraph block positions will be displayed.
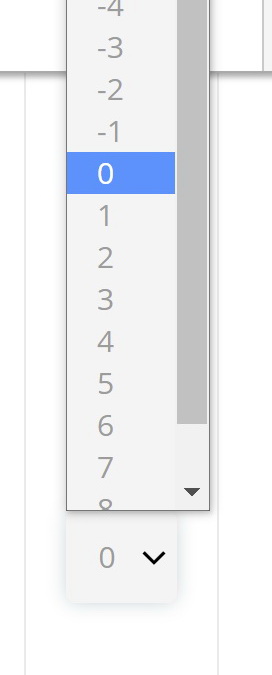
Please note that if you change the location of the Webpage paragraph block, you will also need to change the location of the other Webpage paragraph blocks.
How do I see the list of kloverpoint Webpages that I have created?
To access the list of kloverpoint Webpages that you have created, follow these steps:
1. Log in to your kloverpoint account.
2. Once you have logged in to your kloverpoint account, click on the kloverpoint Menu button.
3. Once the kloverpoint menu has been opened, click on "My Webpage Details".
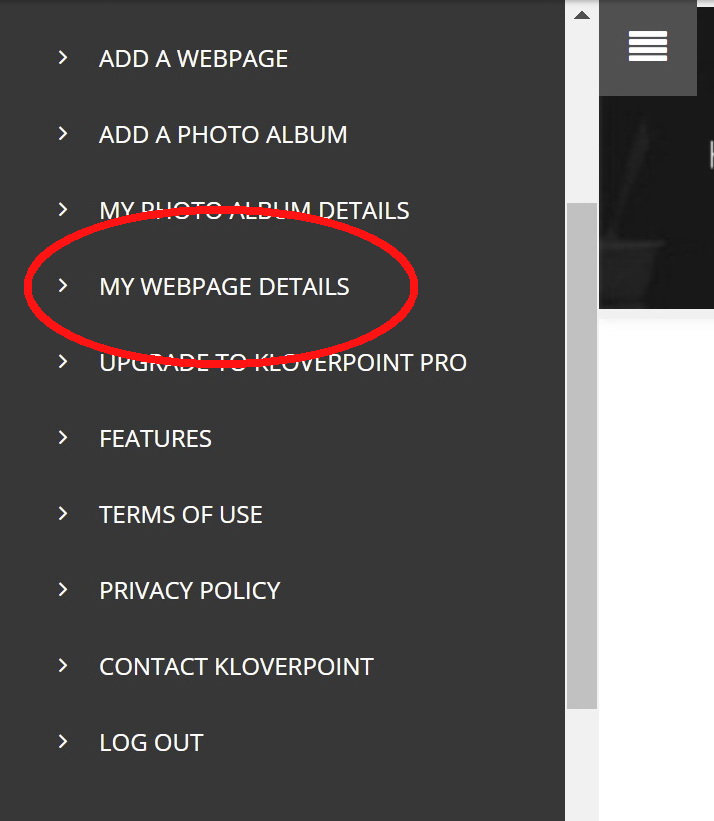
4. Once the "My Webpage Details" page has been opened, you will see a list of kloverpoint Webpages that you have created.
How do I see the list of kloverpoint Photo Albums that I have created?
To access the list of kloverpoint Photo Albums that you have created, follow these steps:
1. Log in to your kloverpoint account.
2. Once you have logged in to your kloverpoint account, click on the kloverpoint Menu button.
3. Once the kloverpoint menu has been opened, click on "My Photo Albums Details".
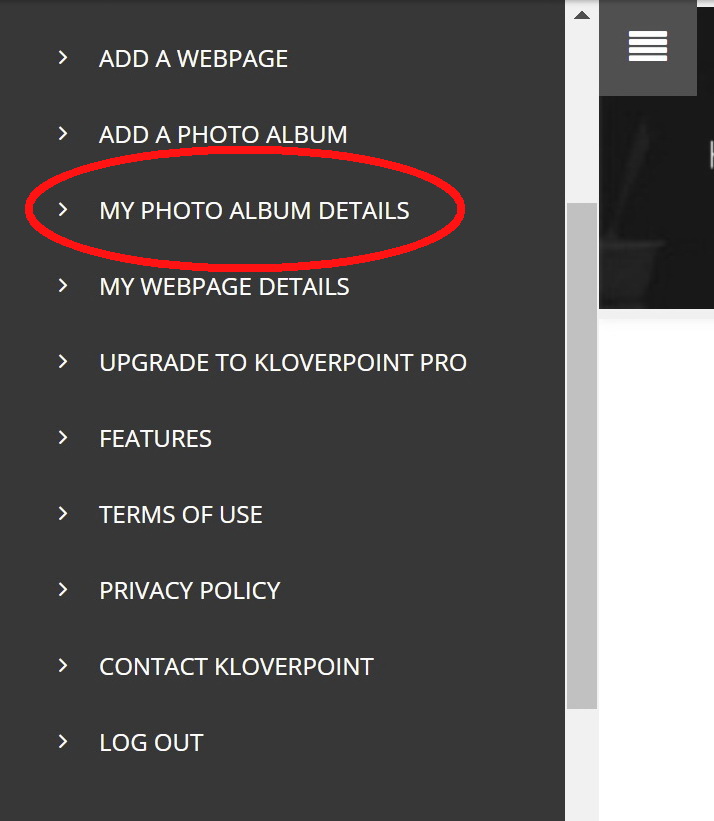
4. Once the "My Photo Albums Details" page has been opened, you will see a list of kloverpoint Photo Albums that you have created.
How do you create a snippet of the kloverpoint webpage that is displayed as a summary by search engines?
Many search engines display a summary below the title of the web page or web site result. The content of the summary is typically generated from a portion or trimmed value of the text that is displayed on a web page. kloverpoint web page creator allows you to customize the search result summary by adding content to the "webpage summary".
Edit the webpage summary with the following steps:
1. Add a new Webpage or edit an existing Webpage
2. In the Webpage Body section, click on "Edit summary"

3. Type the text that you would like to display in the search result summary

4. Click "Save"
How do you set a background color for a kloverpoint web page?
Here are the steps to create a kloverpoint web page or web page block with a colored background:
- Click on the "Source" icon in the text editor
- Insert the following code: <div style="color:#000000; background-color: #929292;background-position: center;padding:25px;background-width:100%;background-height:100%;"></div>
- Click "Save"
In the above code, the text font color is set to black by default (color:#000000). If you would like to set your own text font color, simply highlight the text and select your color choice by clicking on the font color button in the text editor toolbar.
Background color is determined with "background-color: #929292". The hex color code "#929292" has been inserted for example purposes. Simply insert the hex color code of your choice.
How do I upgrade my kloverpoint account?
There are 2 ways that you can upgrade your kloverpoint account. Both ways require you to be logged in to your kloverpoint account.
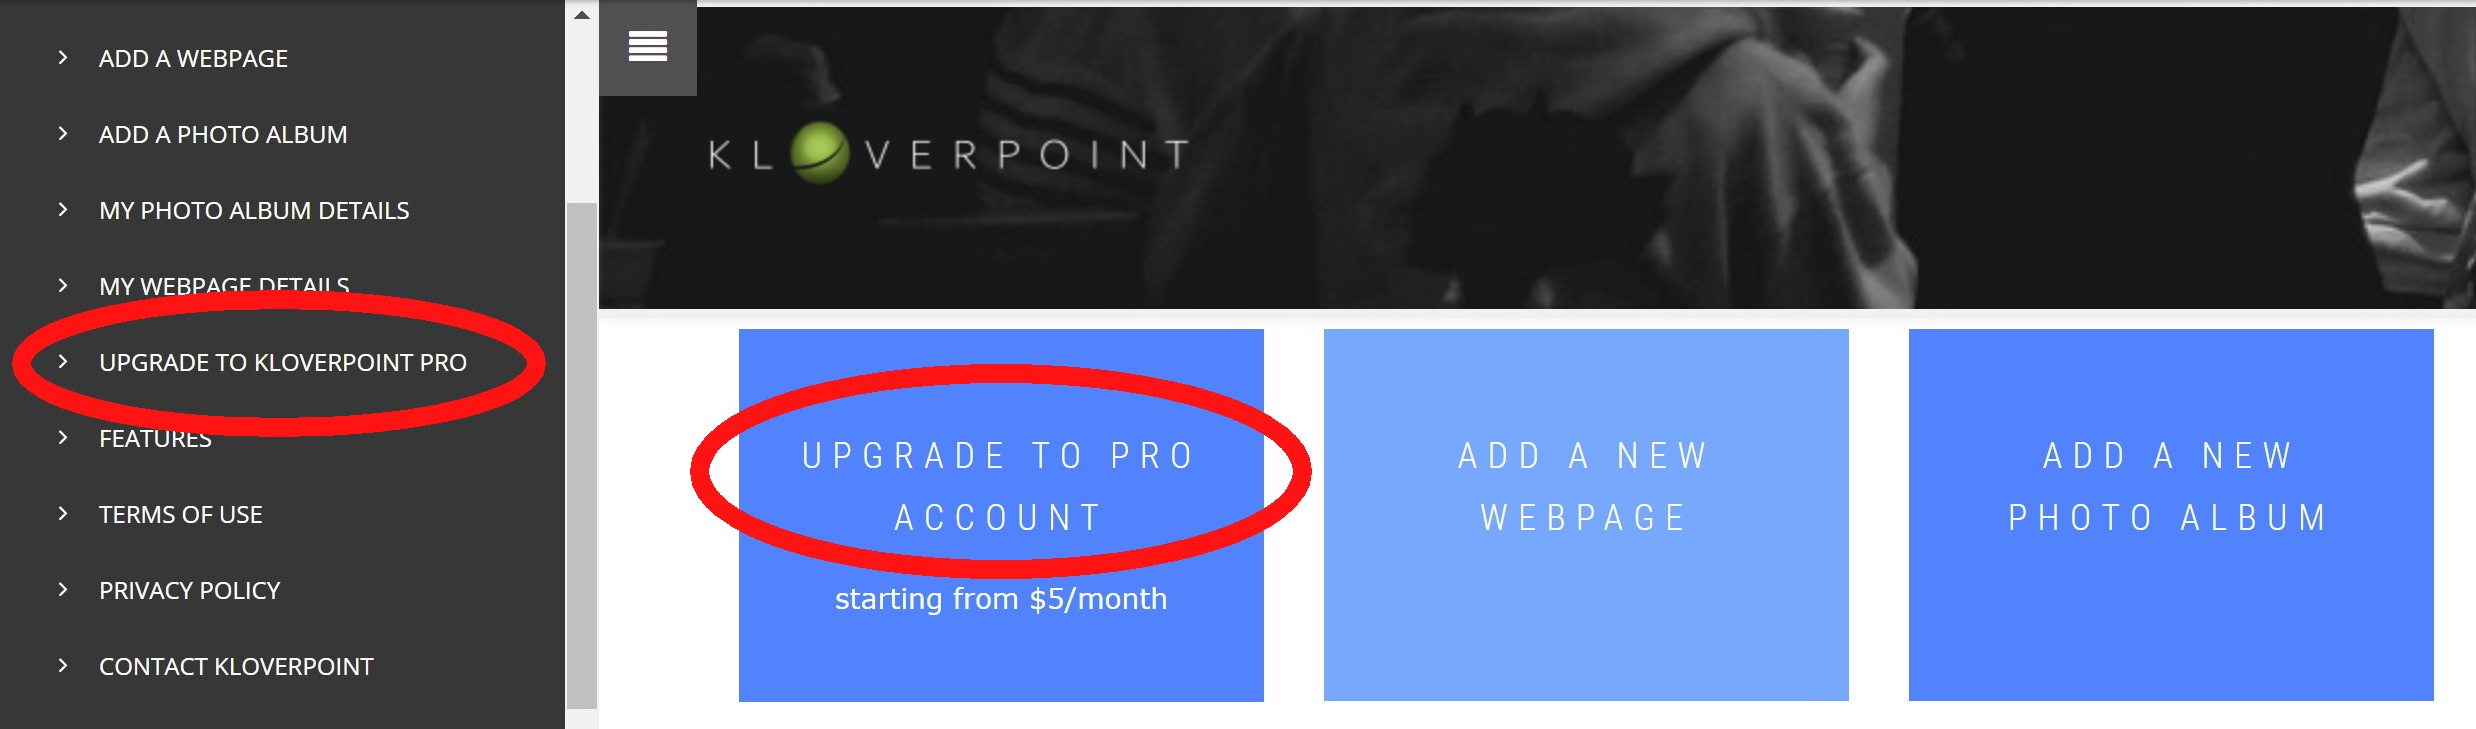
Method #1. Once you have logged in to your kloverpoint account, you will be directed to you kloverpoint profile page. At the top of this page will be quick menu links. Click on the "Upgrade to Pro Account" button.
Method #2. Once you have logged in to your kloverpoint account, click on the kloverpoint Menu button and select "Upgrade to kloverpoint Pro".
How do I publish/unpublish a Webpage Paragraph Block?
By default, Webpage paragraph blocks are published when the kloverpoint Webpage is saved. If you would like to create a Webpage paragraph block without publishing it, simply de-select/uncheck the box next to "Publish". This box is located near the bottom of the Webpage paragraph block, just under the "Authored On" information.
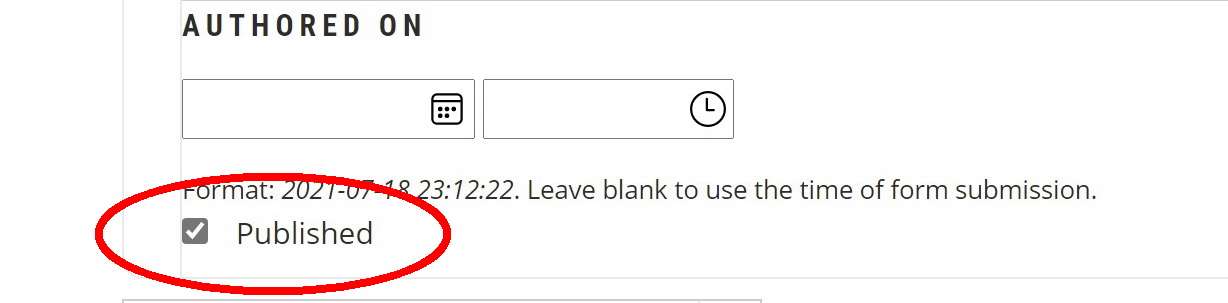
To published an unpublished kloverpoint Webpage paragraph block, simply select/check the box and "Save" the Webpage.
Does upgrading to a kloverpoint Pro account require a subscription?
Yes, upgrading your kloverpoint account from a free account to a Pro account requires a monthly subscription. For more details, CLICK HERE. If you are looking for a custom solution, please contact kloverpoint.
How do I enable/disable user Comments feature?
By default, "Comments" are enabled when you create a kloverpoint Webpage or Photo Album. To disable the ability for other kloverpoint users to post comments on your Webpages or Photo Albums, you will need to select "Closed" under the Comments options which is located at the bottom of the kloverpoint Webpage or Photo Album.

To enable user comments on your Webpages or Photo Albums, select "Open" under the Comments options.
How do I backup the HTML code of my kloverpoint Webpage?
If you would like to create a backup document of the HTML code of your kloverpoint Webpage, simply click on the "Source" button in the text editor.
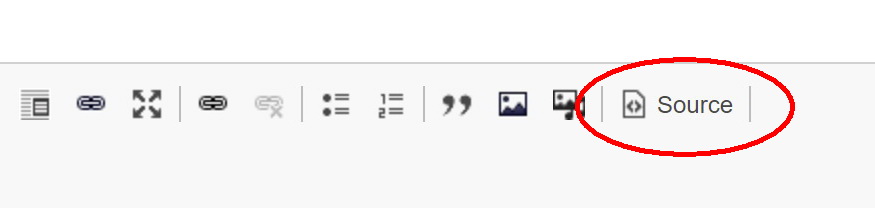
Once you click on the "Source" button, the HTML code of the Webpage will be displayed. Select all of the HTML code, right click on your mouse and select "Copy". Paste all of the HTML code in the text document of your choice and save the document.
If you need to create a copy of the Webpage, click the "Source" button and paste the HTML code in to the body of the text editor. To view the page in HTML, click on the "Source" button again to view how the Webpage will be displayed when saved.